Create an Event
Overview
Events allow you to host meetups, webinars, workshops, or community gatherings directly inside your space.
You can create events from the Events section of your space or a sub-space.
The event creation flow consists of two steps:
Basic event details
Event options and settings
Once published, your event will appear in the Events section where members can register and attend.
Step 1 — Add Event Details
Start by filling in the core information about your event.
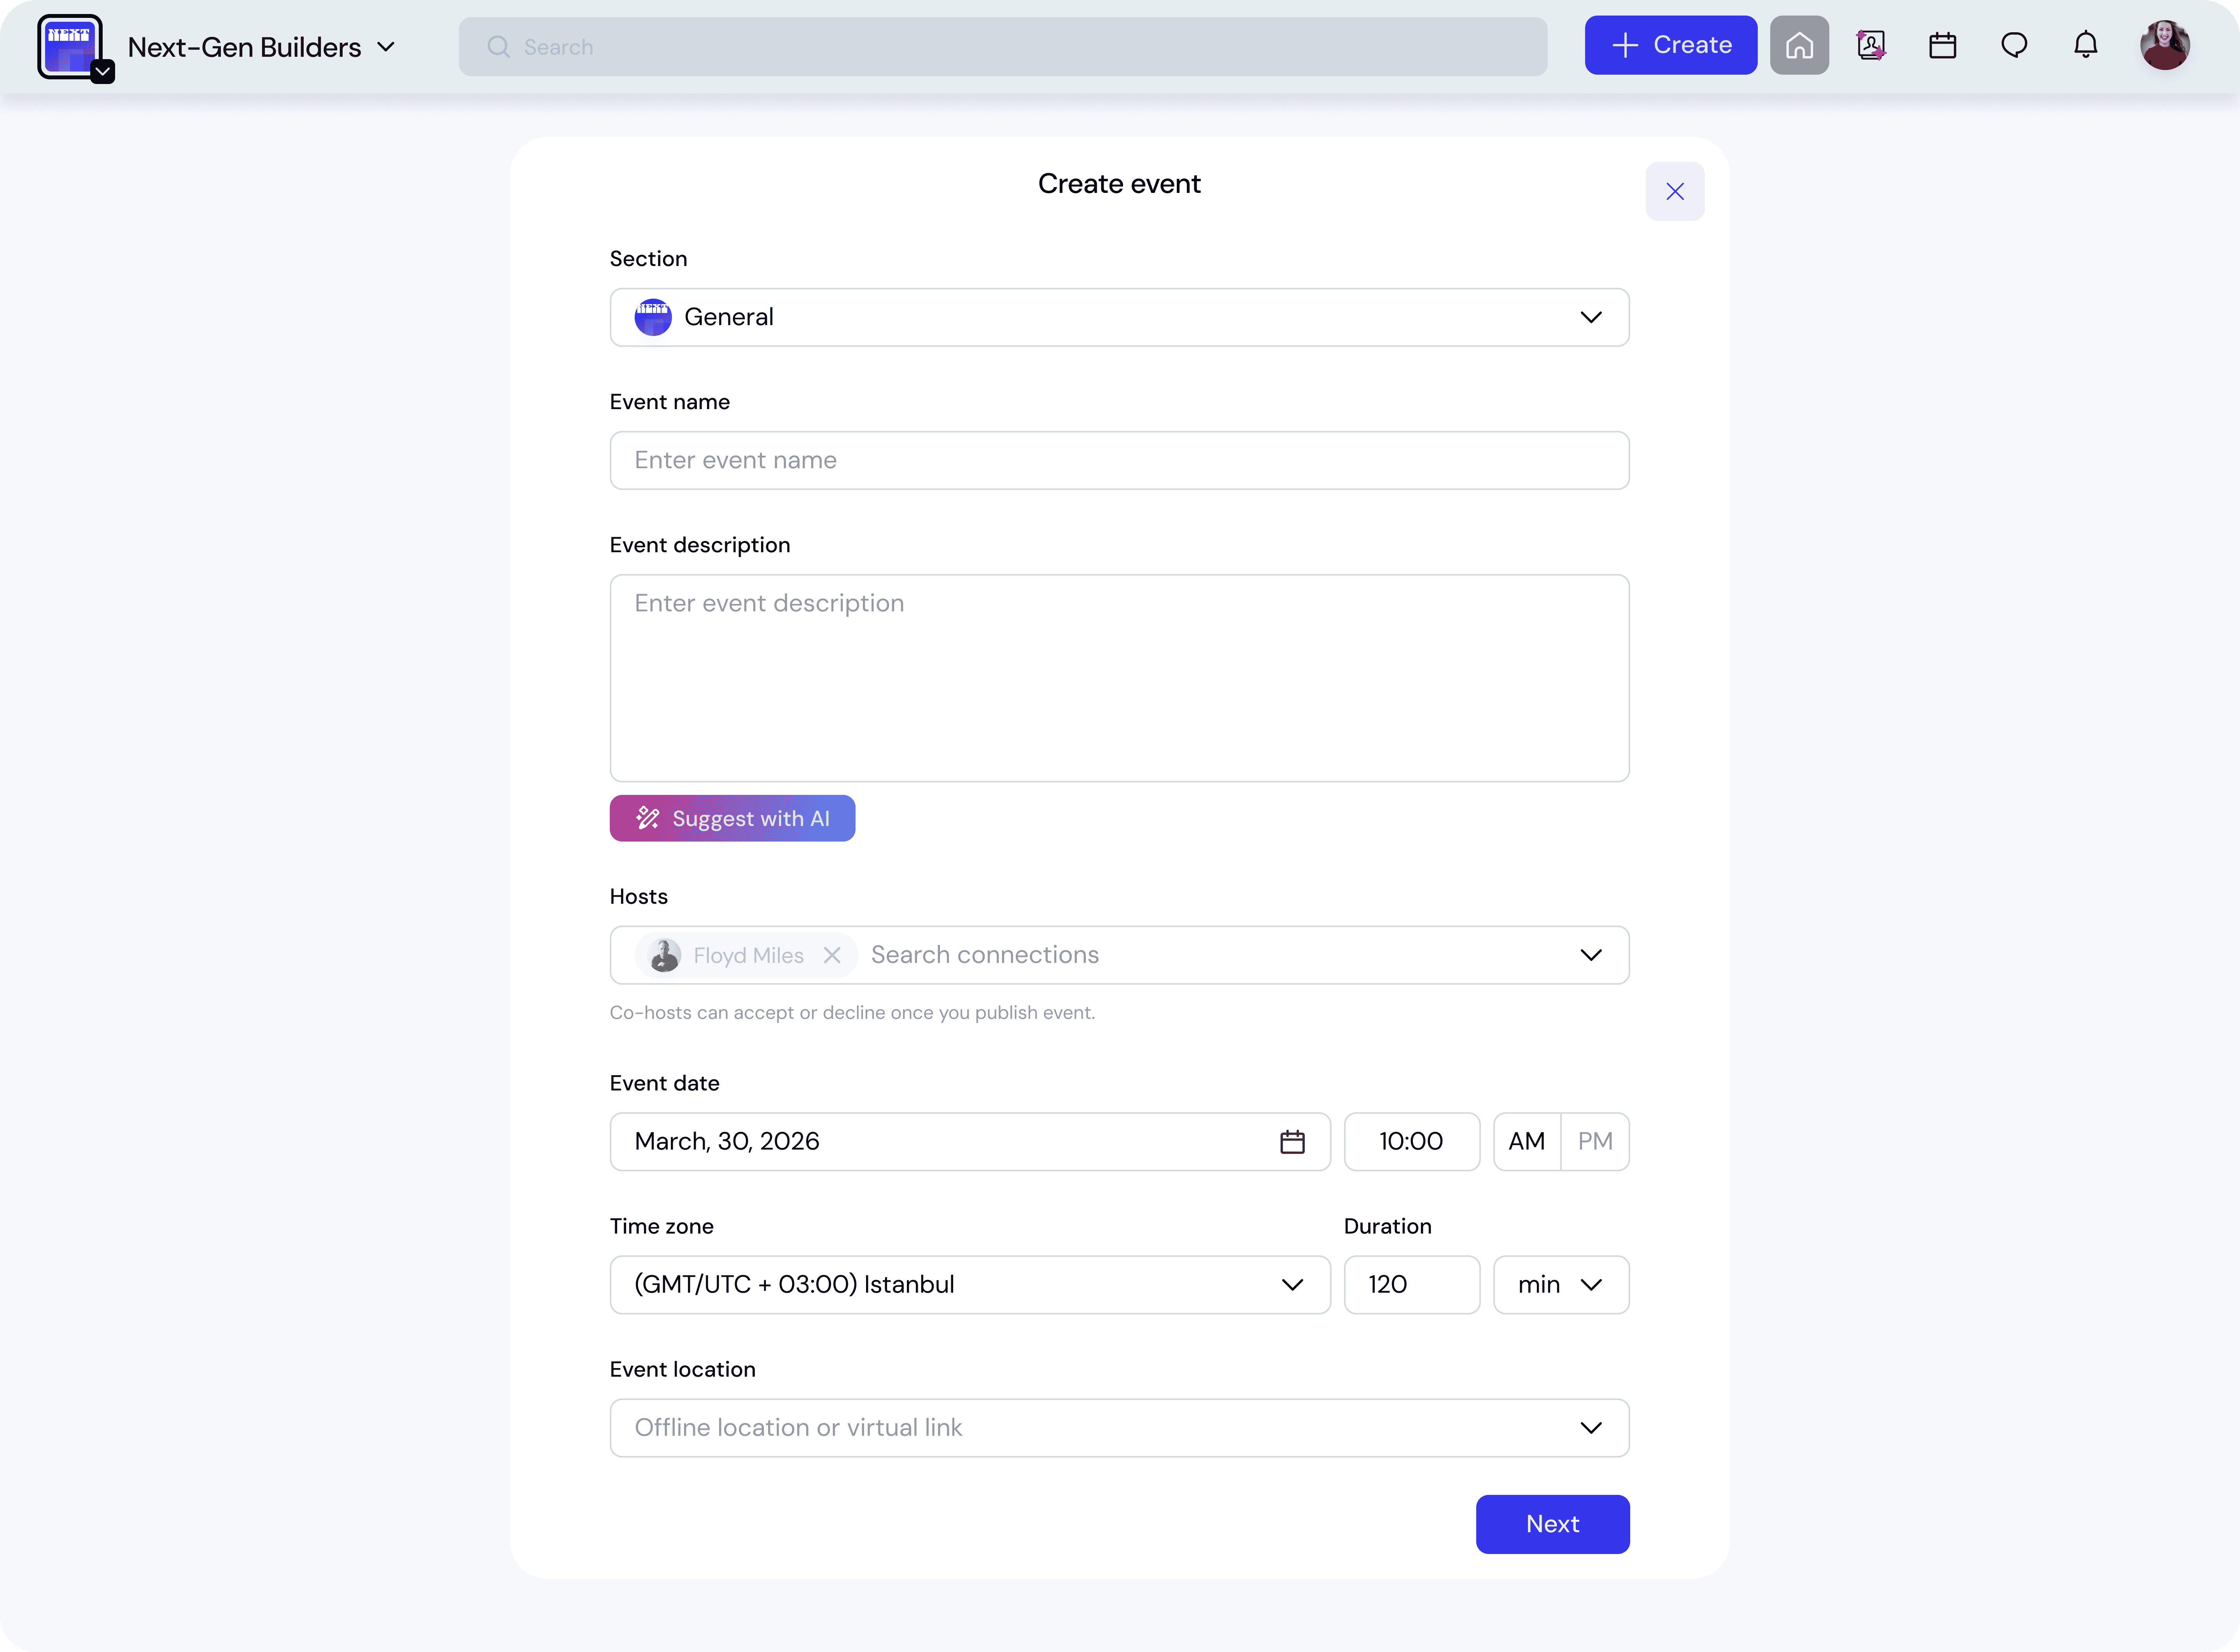
Select the Section
Choose the Events section where the event will appear.
Events can be created in:
the space-level Events section
a sub-space Events section
This determines who can see the event.
Event Name
Enter the title of your event.
Choose a name that clearly explains what the event is about.
Examples:
Founder AMA with Sarah Chen
AI Builders Meetup
Startup Pitch Practice
Event Description
Add a description explaining the event.
Include:
what the event is about
who should attend
what participants will gain
You can also use Suggest with AI to automatically generate an event description and edit it afterward.
Hosts
Add one or more hosts for the event.
Hosts are responsible for running and managing the event.
You can search and select members from your connections.
Co-hosts will be able to accept or decline their role once the event is published.
Event Date & Time
Set the date and start time for the event.
Also configure:
time zone
event duration
The duration helps attendees understand how long the event will last.
Event Location
Choose where the event will take place.
Available options include:
EKOS Virtual
URL (Zoom, Google Meet, etc.)
In-person
Hybrid
Depending on the location type, you may need to add:
venue name
venue address
external meeting link
event format (video or audio)
After completing the required information, click Next to continue.
Step 2 — Configure Event Options
In the second step, you configure how the event works for attendees.
Event Cover Image
Upload a cover image for your event.
Recommended image size: 1040 x 520
This image appears on the event page and in event listings.
Access
Choose who can see and join the event.
Community Space
The event is visible only to members of your community.
Public
The event is visible to all EKOS users.
Private (Invite Only)
Only invited participants can access the event.
Tickets
Choose the ticket type for the event.
Free
Attendees can register without payment.
Best for:
community gatherings
networking sessions
onboarding calls
Paid
Participants must purchase a ticket to attend.
Used for:
workshops
premium sessions
masterclasses
Donation
Attendees choose how much they want to contribute.
Used for:
community-supported events
fundraising events
Event Settings
These options control how attendees interact with the event.
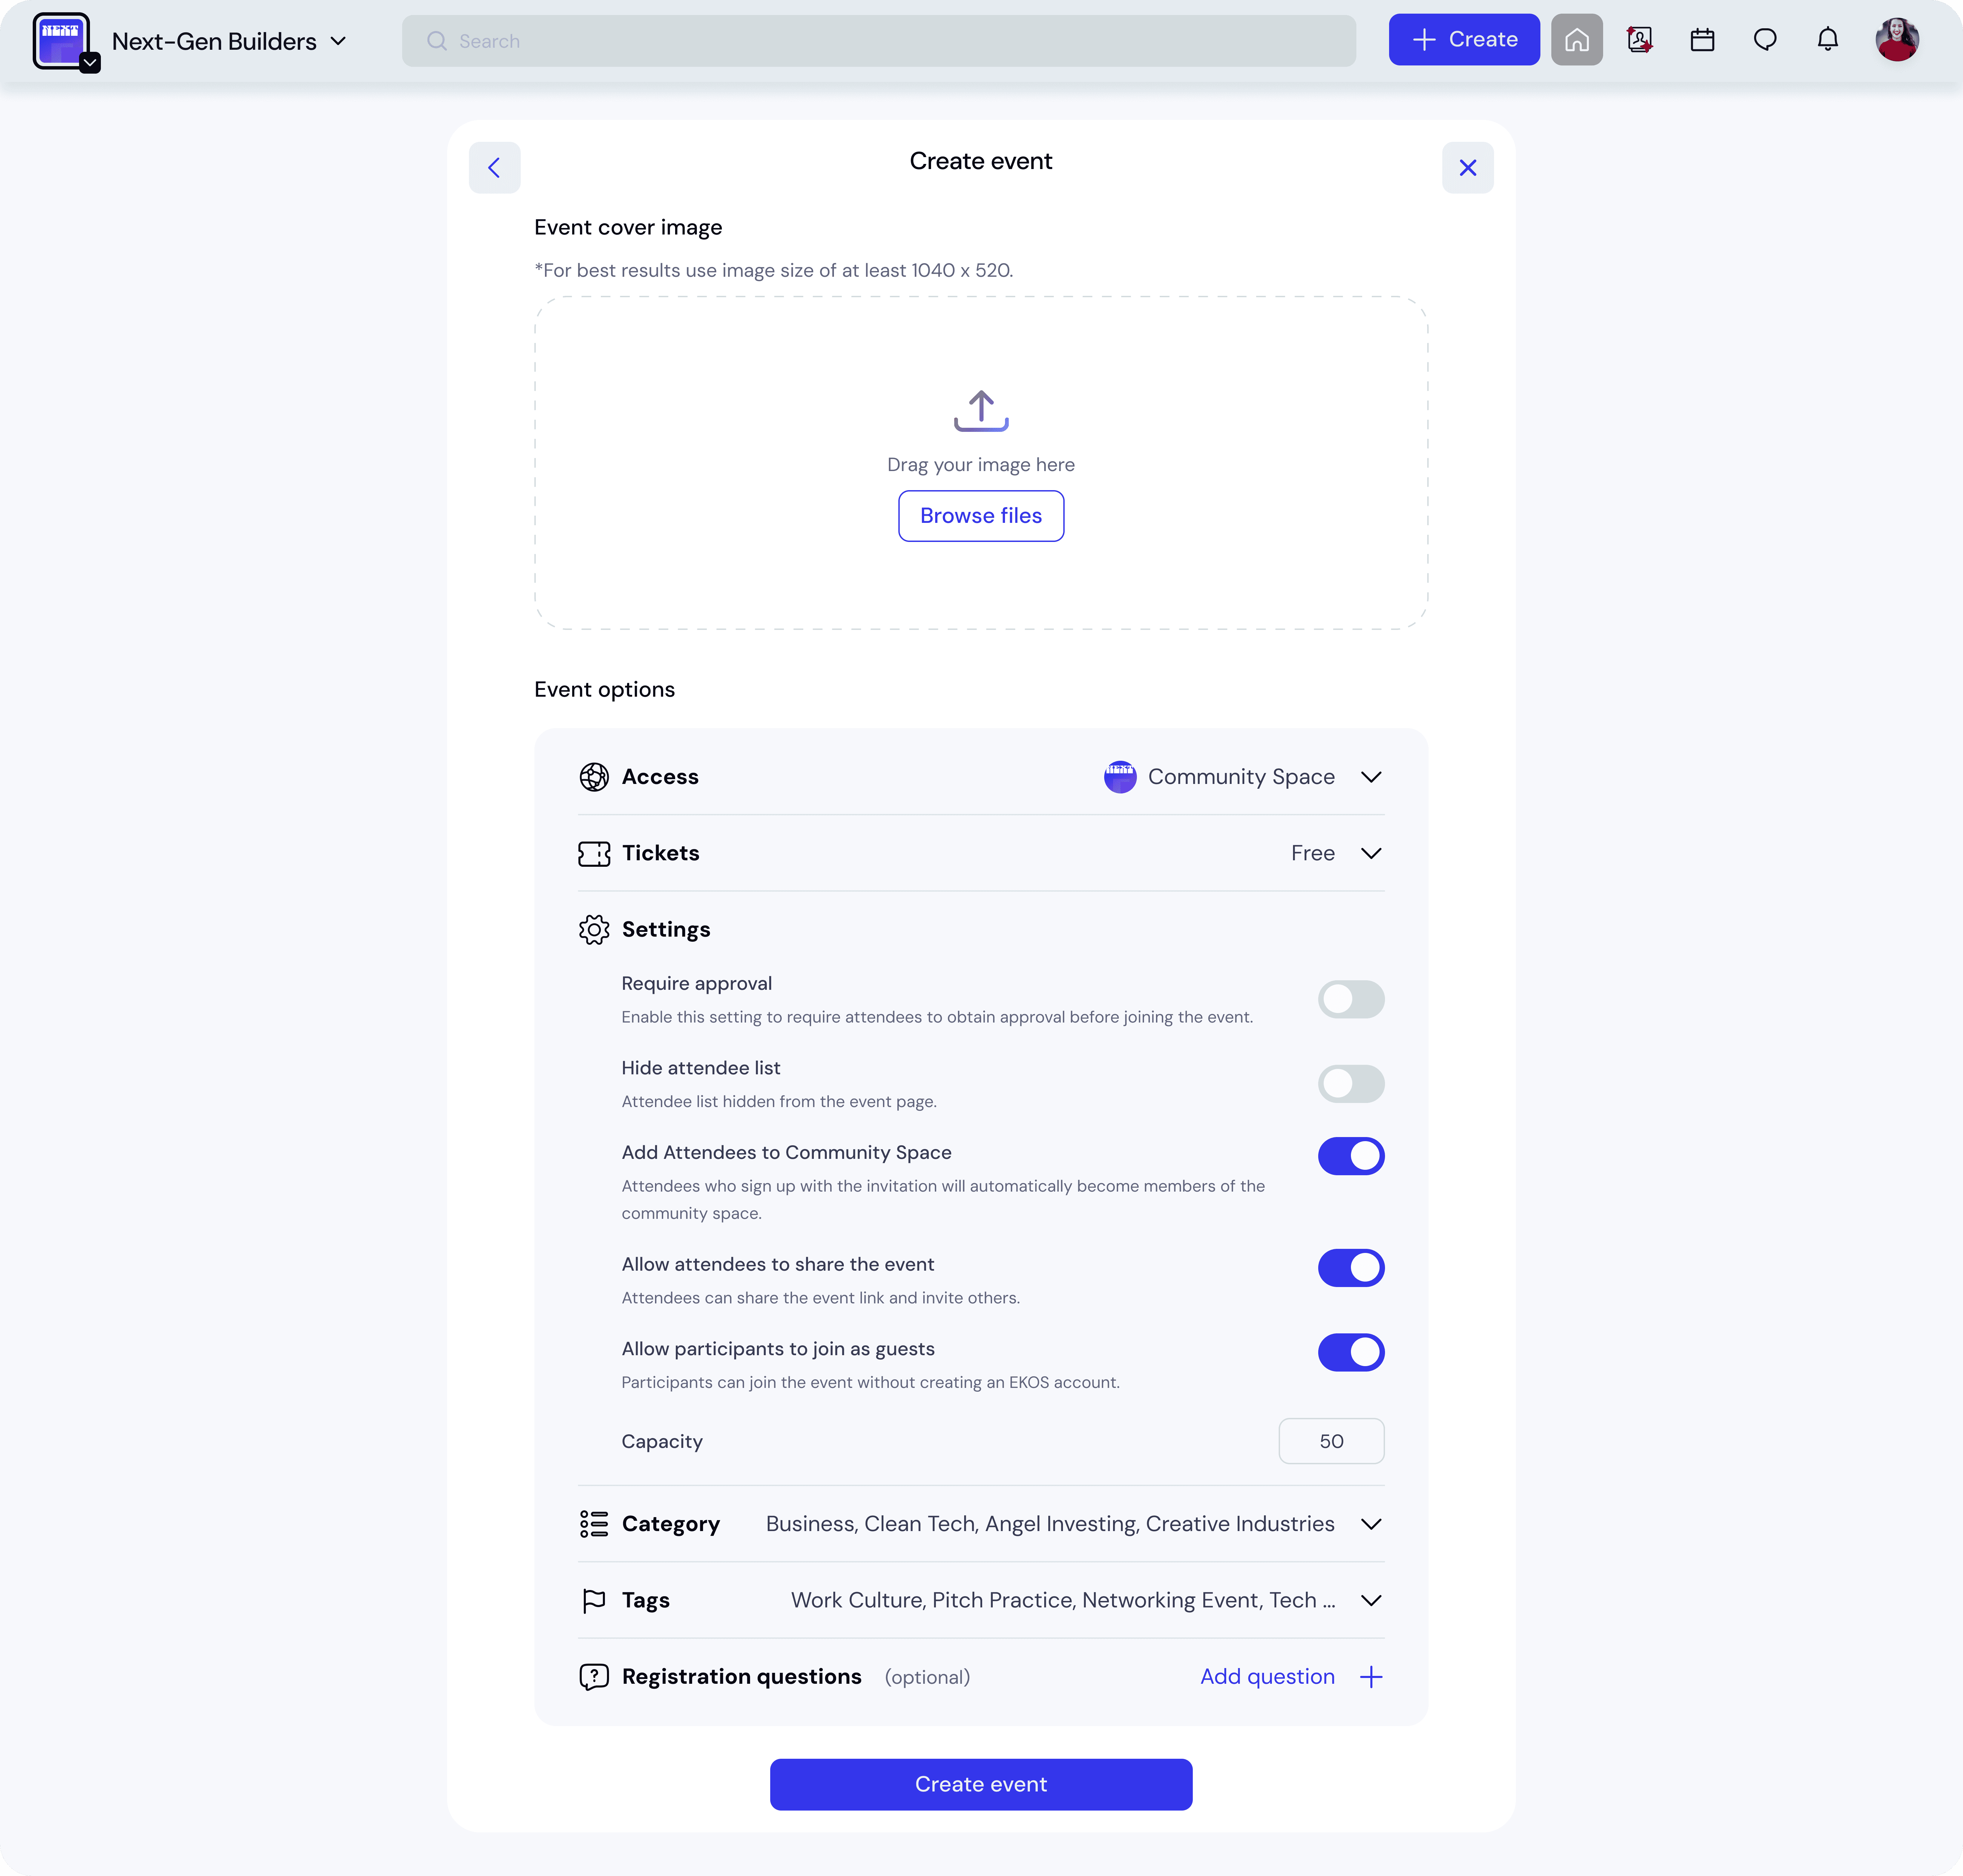
Require Approval
Enable this option if attendees must be approved before joining the event.
This is useful for:
limited events
curated groups
invite-based sessions
Hide Attendee List
If enabled, the attendee list will not be visible on the event page.
This may be useful for private or sensitive events.
Add Attendees to Community Space
When enabled, people who register for the event will automatically become members of the community space.
This is helpful for converting event participants into community members.
Allow Attendees to Share the Event
When enabled, attendees can share the event link and invite others.
This helps your event spread organically.
Allow Participants to Join as Guests
Participants can attend the event without creating an account.
This lowers the barrier for external attendees.
Capacity
Set the maximum number of attendees.
If no limit is set, the event capacity will remain unlimited.
Category
Assign a category to help organize events.
Examples:
Online Webinar
Community Seminar
Networking Event
Online Class
Categories help members filter and discover events more easily.
Tags
Add tags to help classify your event.
Tags improve searchability and help members find relevant events.
Example tags:
#AI
#Networking
#Startup
#PitchPractice
You can also create custom tags.
Registration Questions
You can optionally add questions that attendees must answer during registration.
This is useful for:
collecting attendee information
understanding participant goals
qualifying attendees for specific events
Publish the Event
Once everything is configured, click Create event to publish it.
Your event will immediately appear in the Events section and will be visible according to the access settings you selected.
Best Practices
Use clear titles
A strong event title improves registration rates.
Add a cover image
Events with images are significantly more visible in event lists.
Use categories and tags
These help members discover relevant events quickly.
Set the right access level
Use Public for large events and Private for curated sessions.