Set Up Sections
Overview
Sections define how members interact inside a space or subspace.
Each section represents a specific type of content or activity.
Examples include:
posts & announcements
events
resources
people directory
Sections help organize conversations and make it easier for members to participate.
Common Section Types
Post Section
The Posts section is the primary space for discussions and updates within your community.
Members can use this section to:
start conversations
ask questions
share updates
introduce themselves
post announcements
Announcements are created within the Posts section and can be highlighted or pinned by admins when important updates need extra visibility.
Examples of posts you might see:
community introductions
weekly discussions
important updates
feedback requests
announcements
Event Section
Used to organize community events.
Examples include:
webinars
workshops
meetups
networking sessions
Members can RSVP and participate directly through the platform.
Resource Section
Used to store valuable materials and references.
Examples:
guides
templates
recordings
documents
This becomes a knowledge library for your community.
People Section
Displays a directory of community members.
Members can discover and connect with others based on:
interests
expertise
markers
location
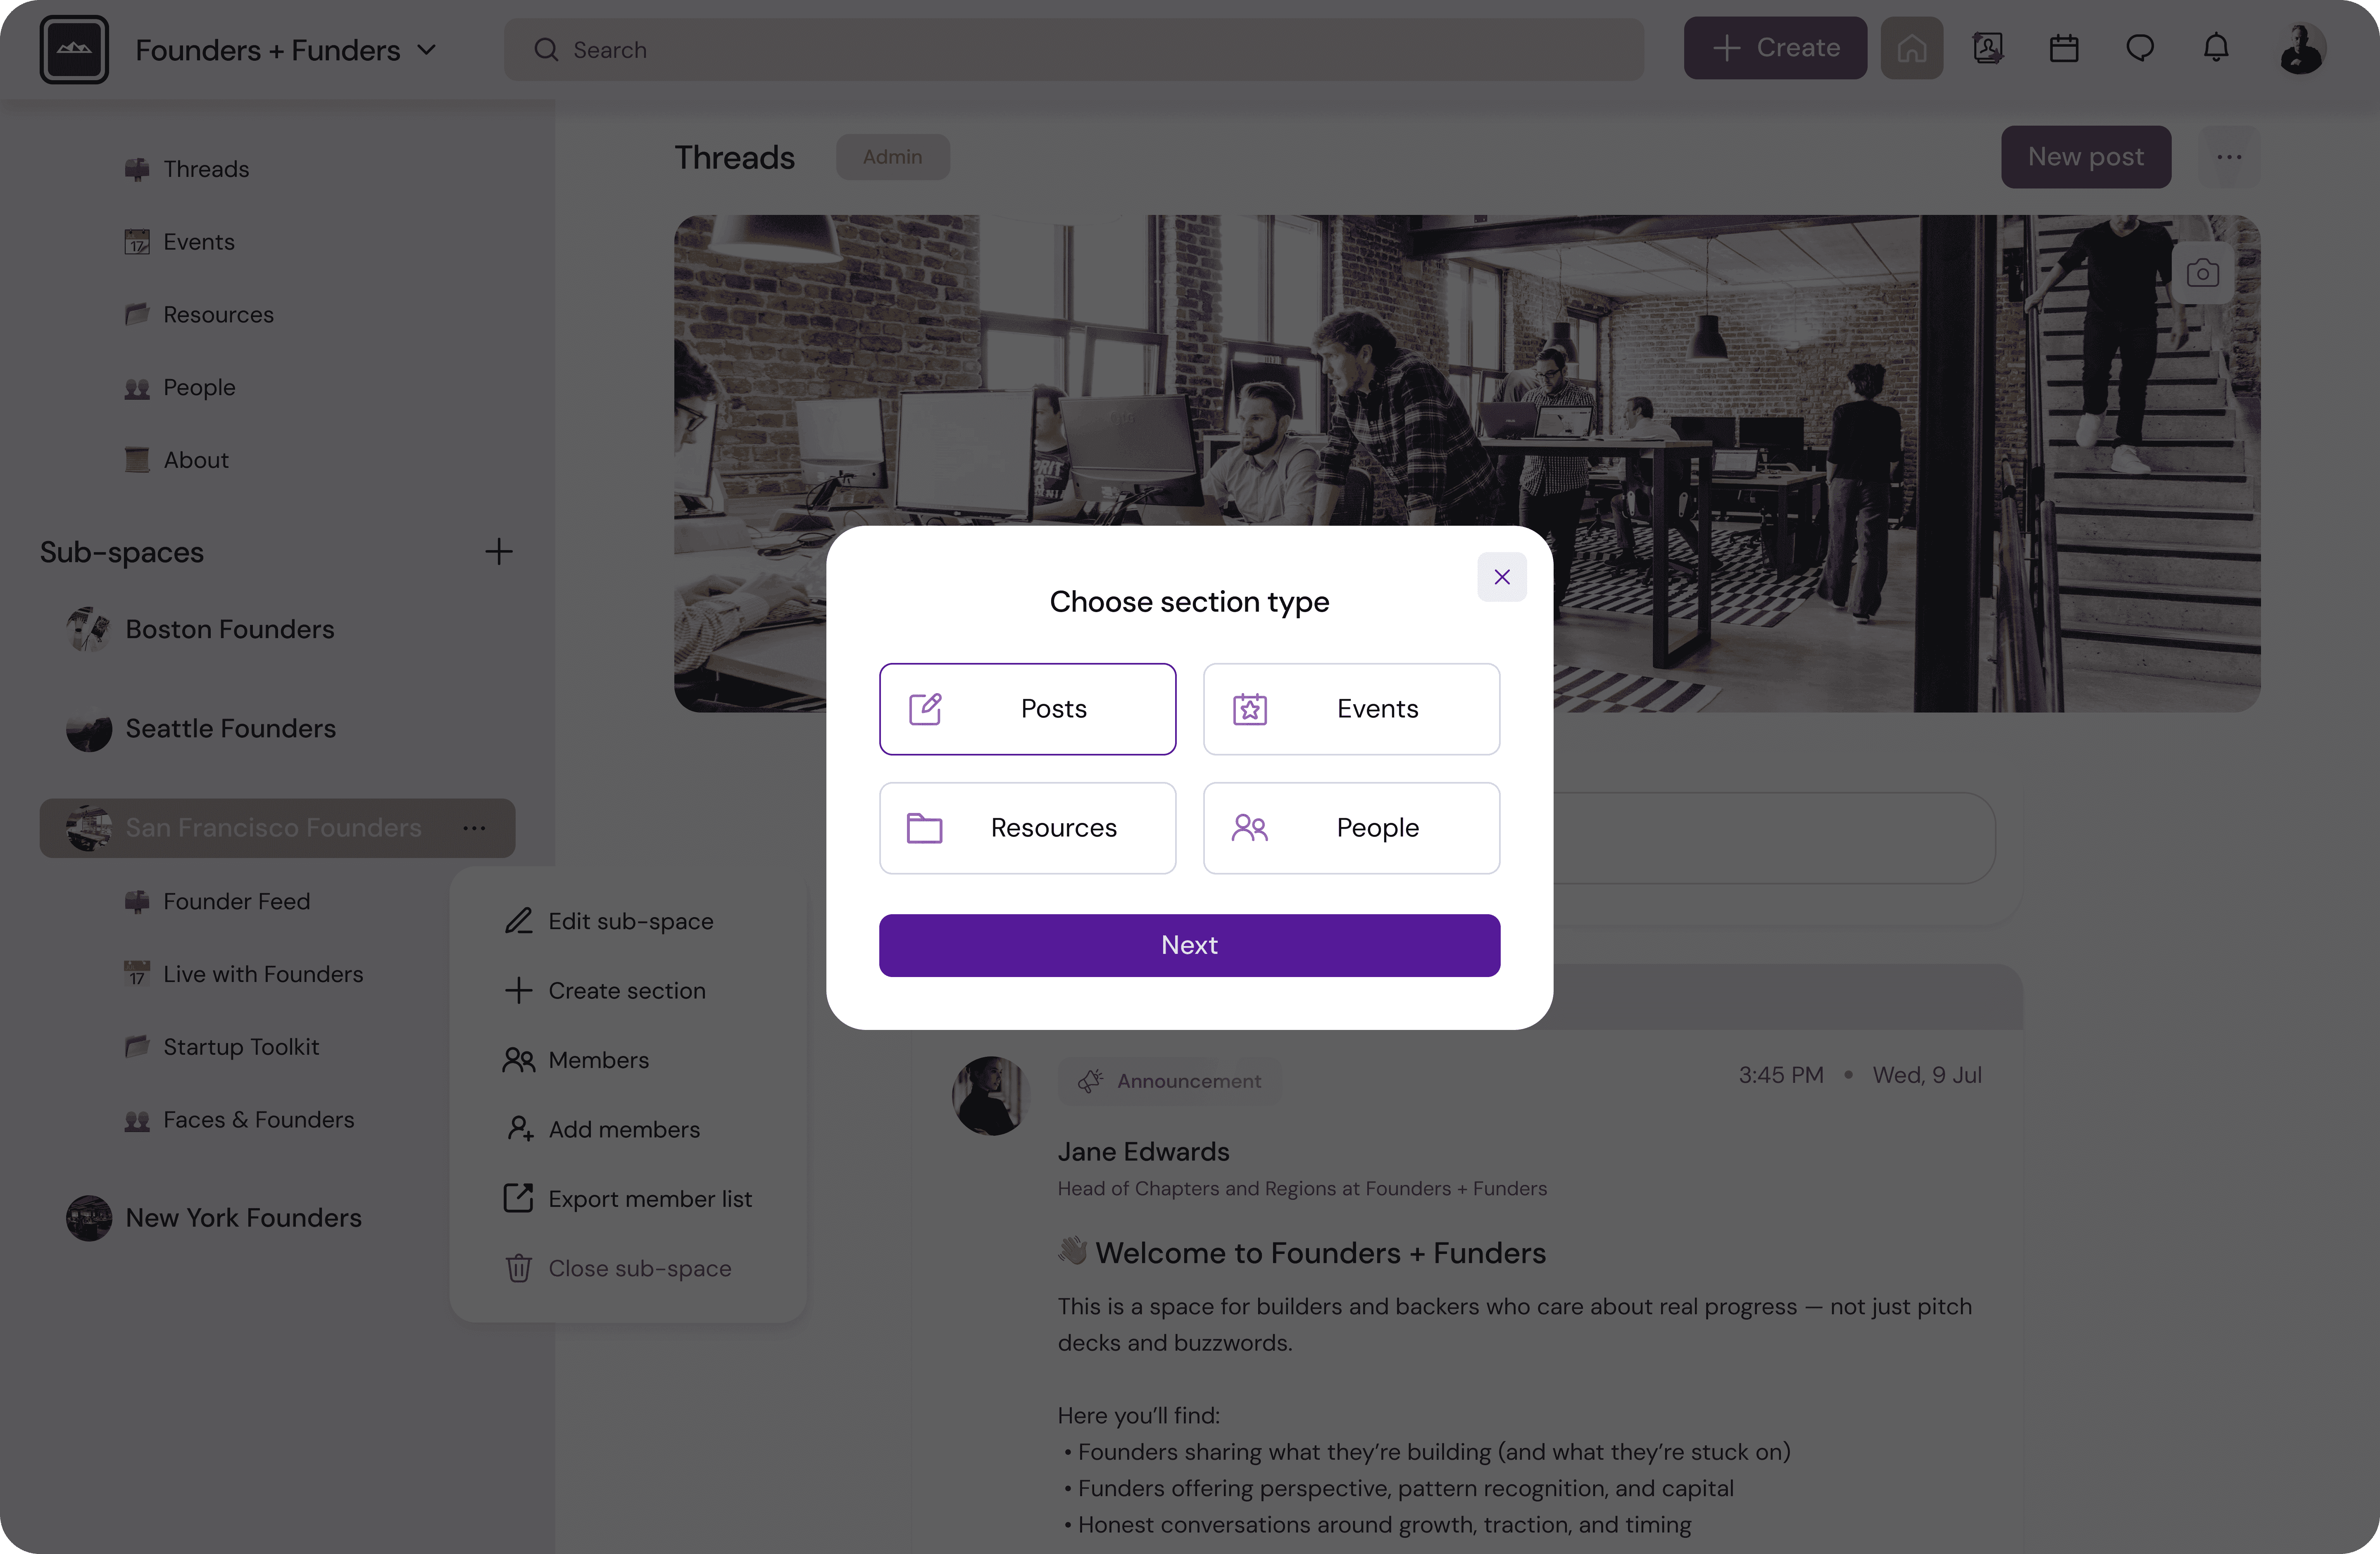
How to Create a Section
Sections can be created inside a space or a subspace to organize discussions, events, resources, and other activities.
To create a new section:
Navigate to the space or subspace where you want to add the section.
Click New section in the top-right corner of the page.
The Create section window will open.
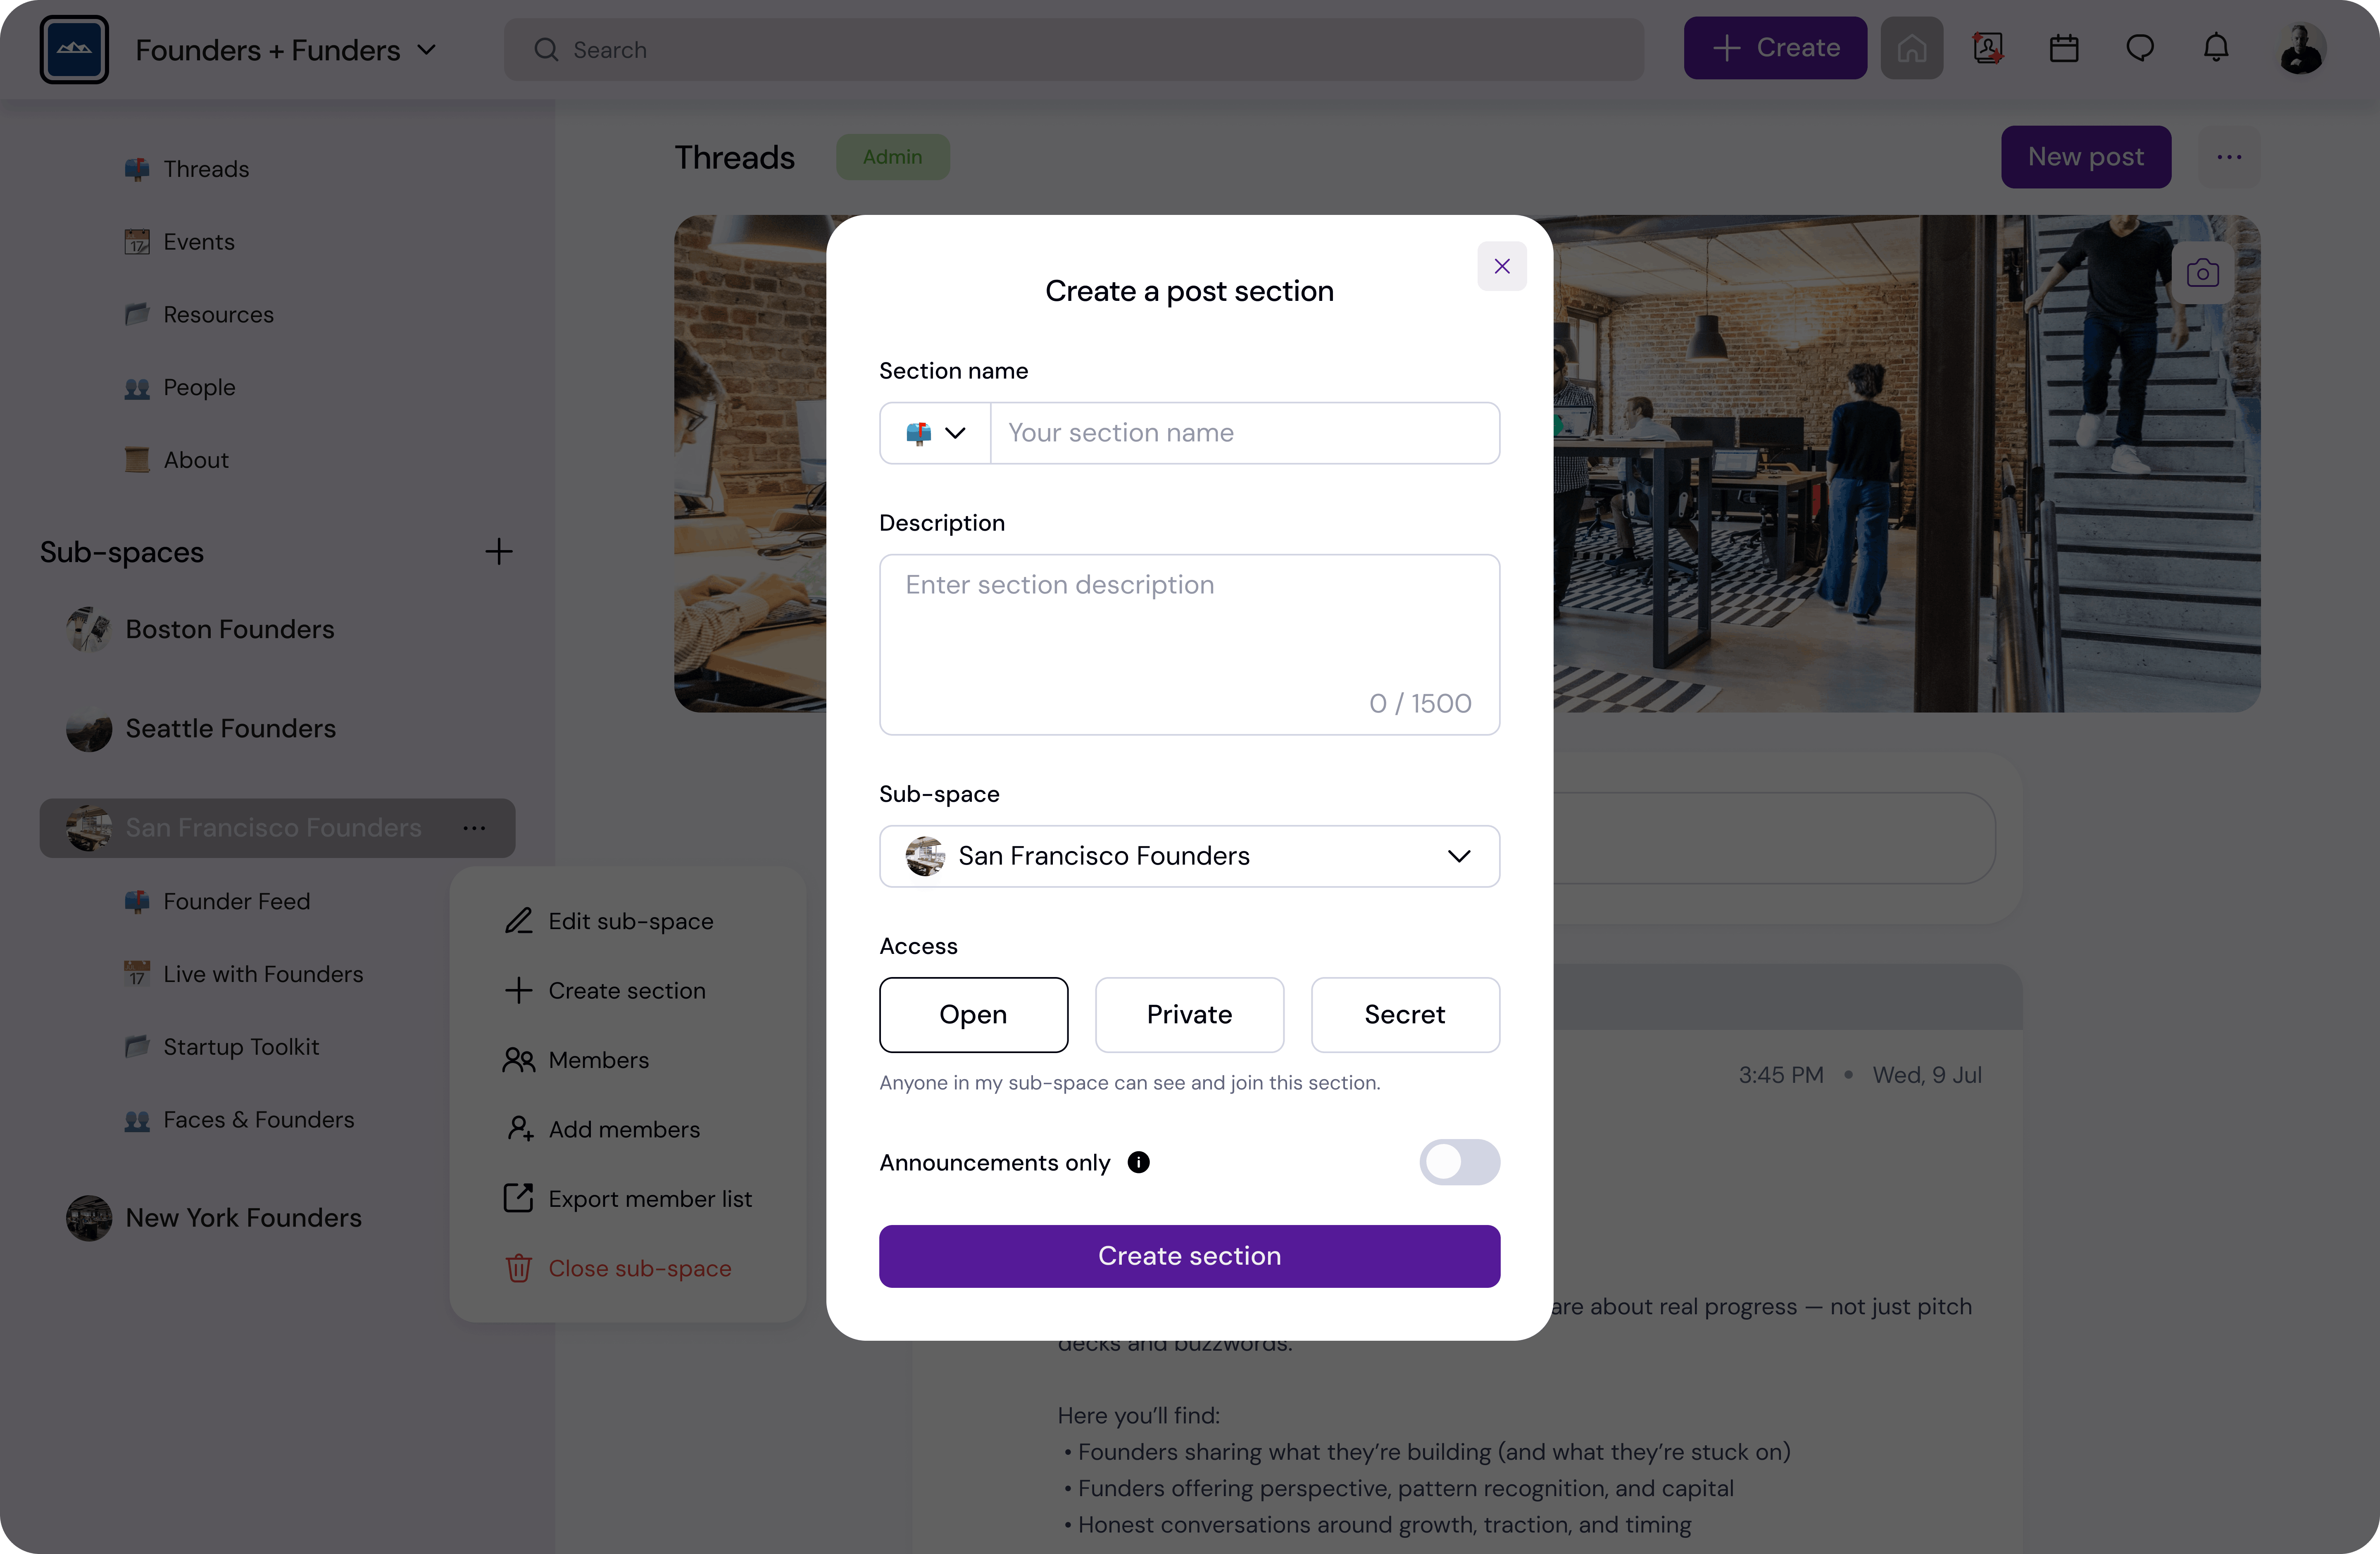
Configure Your Section
Complete the following fields in the creation window.
Section Icon (Emoji)
You can choose an emoji to visually represent the section.
This icon will appear in the navigation menu and helps members quickly identify the section.
Examples:
💬 Discussions
📣 Community Updates
💡 Ideas
🤝 Introductions
Section Name
Enter the name of the section.
Choose a clear and descriptive name that reflects the type of activity happening in that section.
Examples:
Introductions
Weekly Discussions
Founder Updates
Product Feedback
Avoid vague names like General or Random.
Description
Add a short description explaining what the section is for.
This helps members understand:
what kind of content belongs here
who should participate
how the section is used
Descriptions are especially helpful when multiple sections exist in the same subspace.
Subspace
Select the subspace where the section will be created.
Sections always belong to a specific subspace, which helps organize your community structure.
If you have multiple subspaces, make sure the section is added to the most relevant one.
Access Type
Choose how members can access the section.
Open
Anyone in the subspace can see and join the section.
Private
The section is visible but members must be invited to participate.
Secret
Only invited members can see the section.
This setting is useful when creating private discussions, leadership groups, or working teams.
Create the Section
After filling in the required information:
Review the section settings.
Click Create section.
The section will immediately appear in the navigation menu under the selected subspace.
Members will then be able to start posting, sharing resources, or participating depending on the section type.
💡 Tip
When launching a new community, start with a small number of clear sections.
Most communities work best with 4–6 sections initially, expanding as engagement grows.
Best Practices
Use clear section names that communicate the purpose.
Instead of:
❌ General
❌ Random
Use:
✔ Founder Introductions
✔ Weekly Discussions
✔ Investor Opportunities
✔ Product Feedback
Clear structure increases participation.
💡 Tip
Start with 4–6 sections.
Too many sections early on can make a new community feel empty.
As engagement grows, you can add more specialized sections.