User Groups & Access Mapping
Overview
User groups allow you to control which members can access specific sub-spaces and sections in your community.
Instead of assigning permissions one-by-one, you can organize members into groups and manage access at the group level.
This makes it easier to:
manage large communities
grant access to multiple sections at once
structure paid or role-based access
scale your community as it grows
When a member is added to a user group, they automatically receive the permissions assigned to that group.
How User Groups Work
User groups control two things:
1. Members in the Group
You can add specific users to a group.
All users in the group inherit the same access rules.
2. Content Access
Each group can be granted access to:
sub-spaces
sections within sub-spaces
Access can be updated at any time and applies to all members in the group.
Create a User Group
To create a new user group:
Open Space settings.
Navigate to Members → User groups.
Click Create user group.
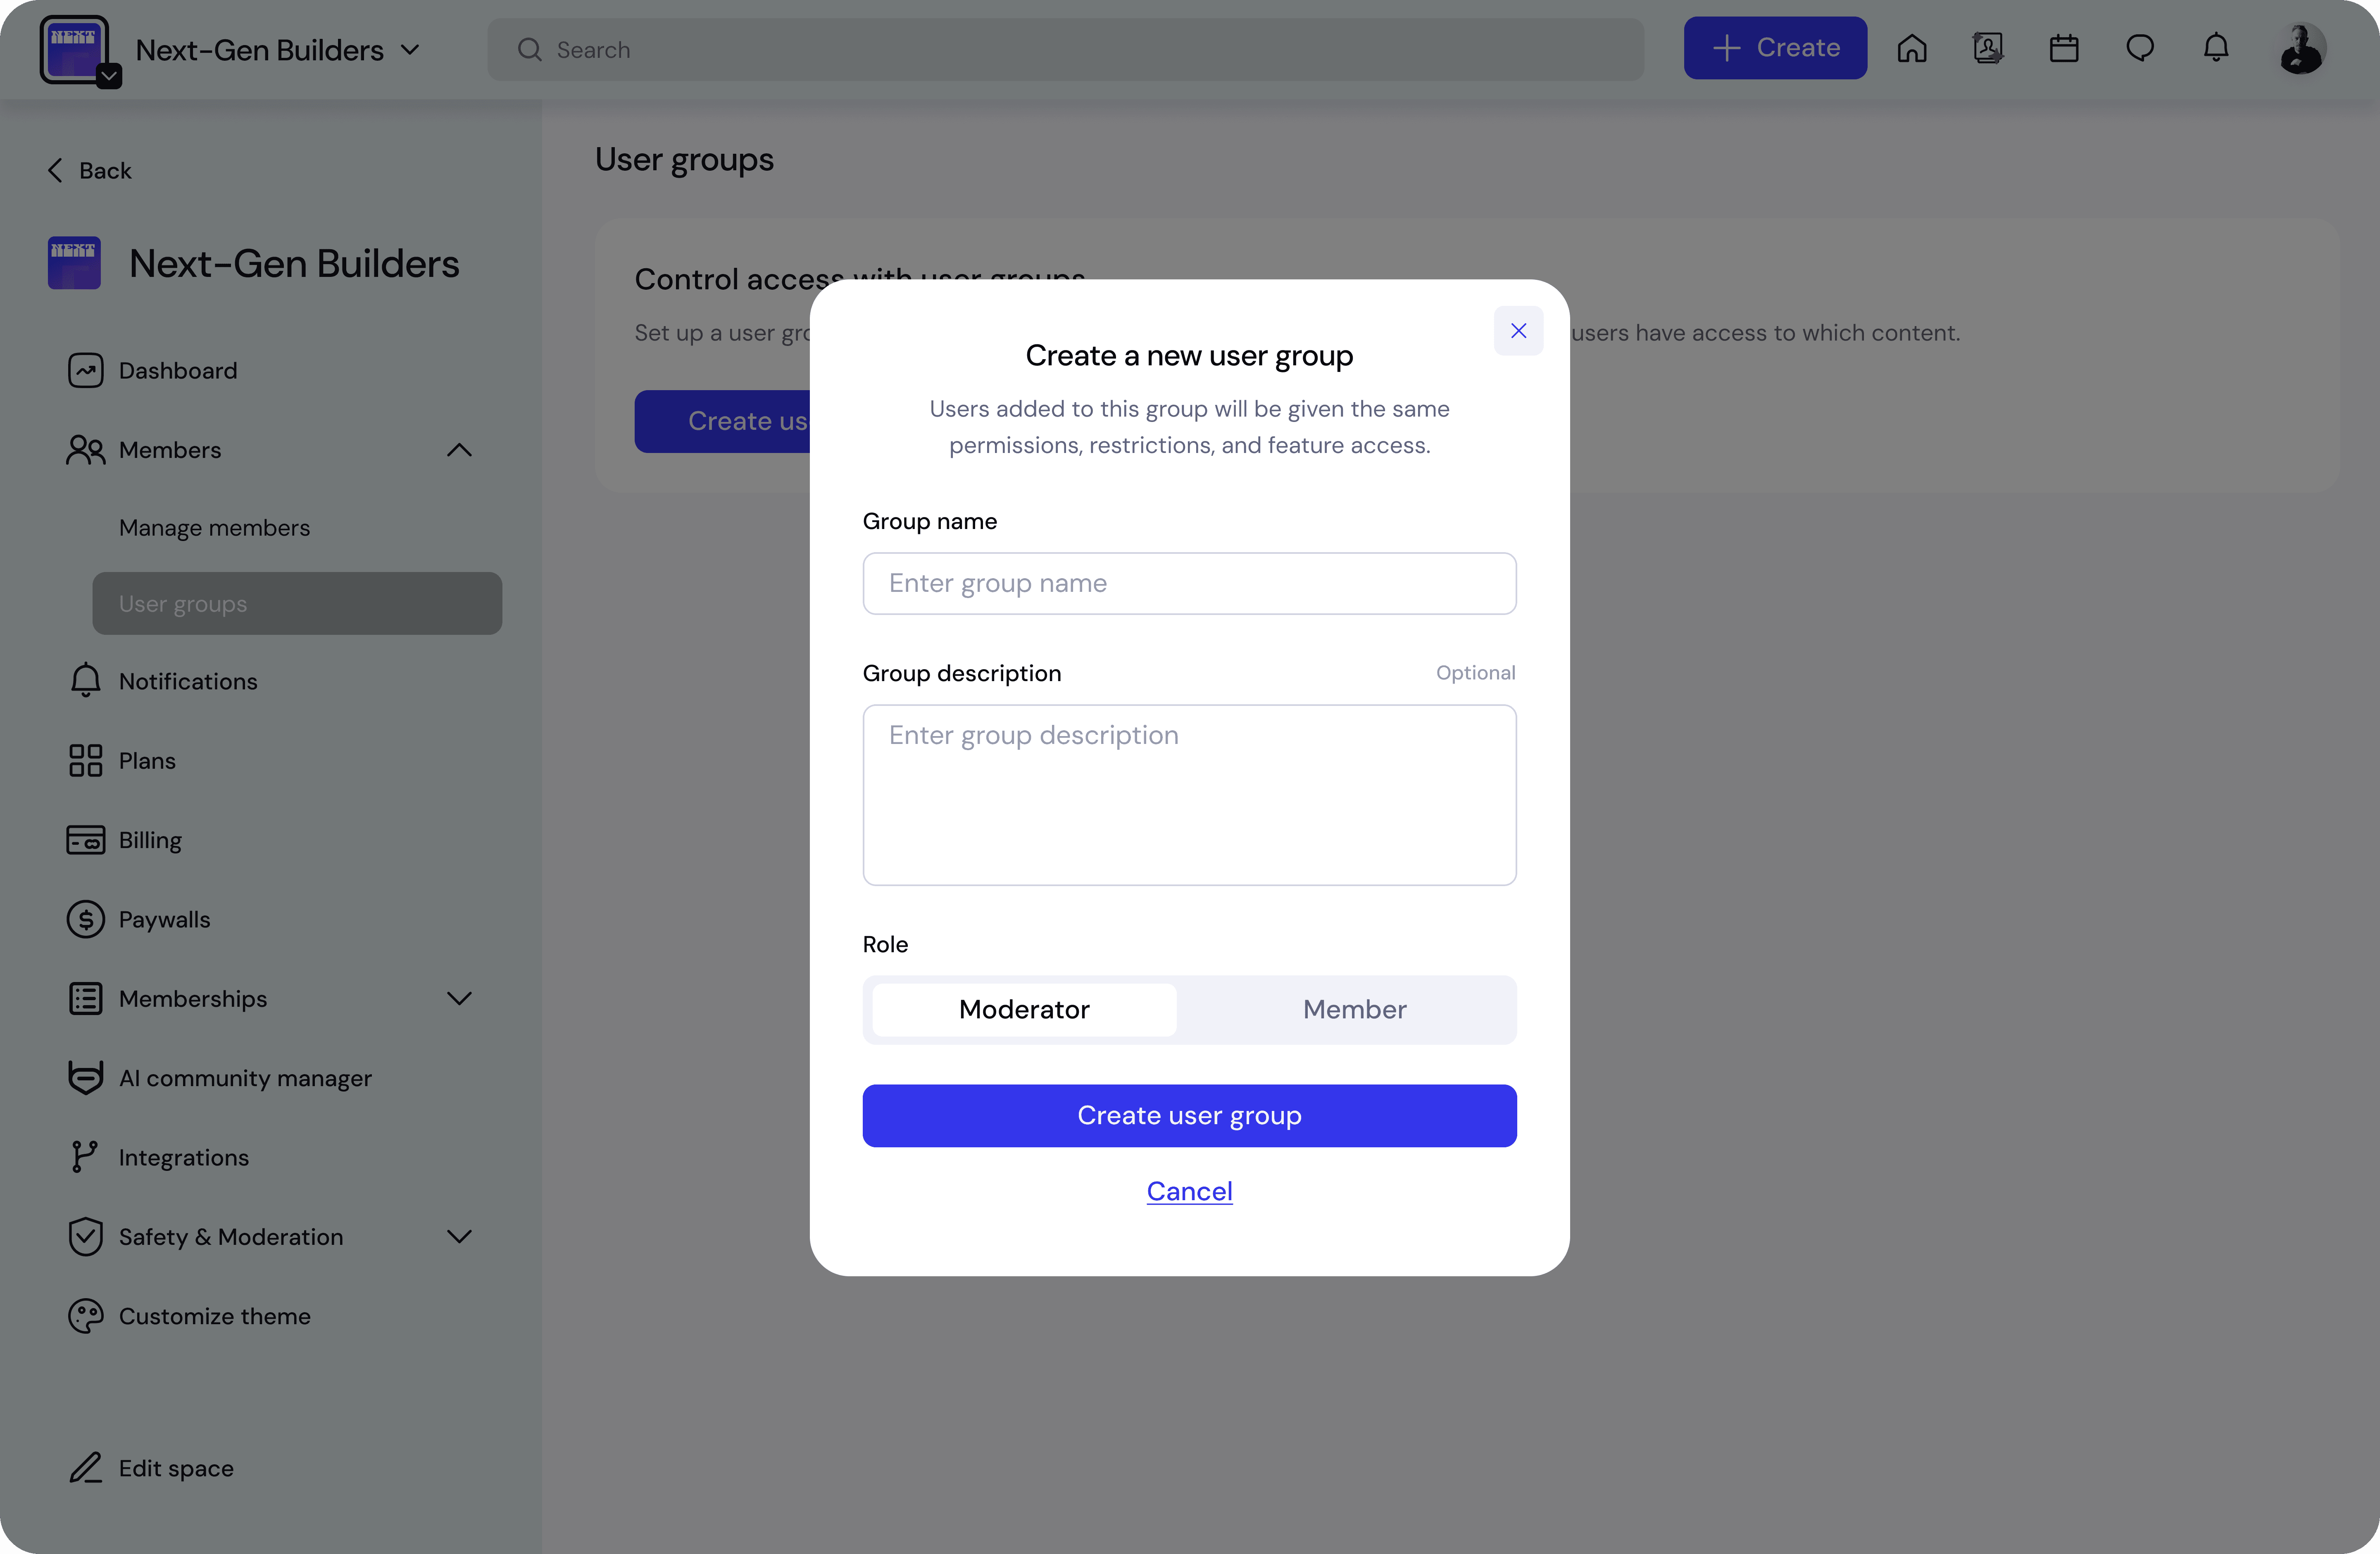
A modal will open.
Fill in the following fields:
Group Name
Enter a name for the group.
Examples:
Pro Members
Champions
Mentors
Event Hosts
Group Description (Optional)
Add a short description explaining the purpose of the group.
Example:
Leaders of the Boston Atlassian community organizing events and mentoring members.
Role
Choose the role assigned to members in this group.
Member
Standard member permissions.
Moderator
Members can help manage and moderate community activity.
Click Create user group to finish.
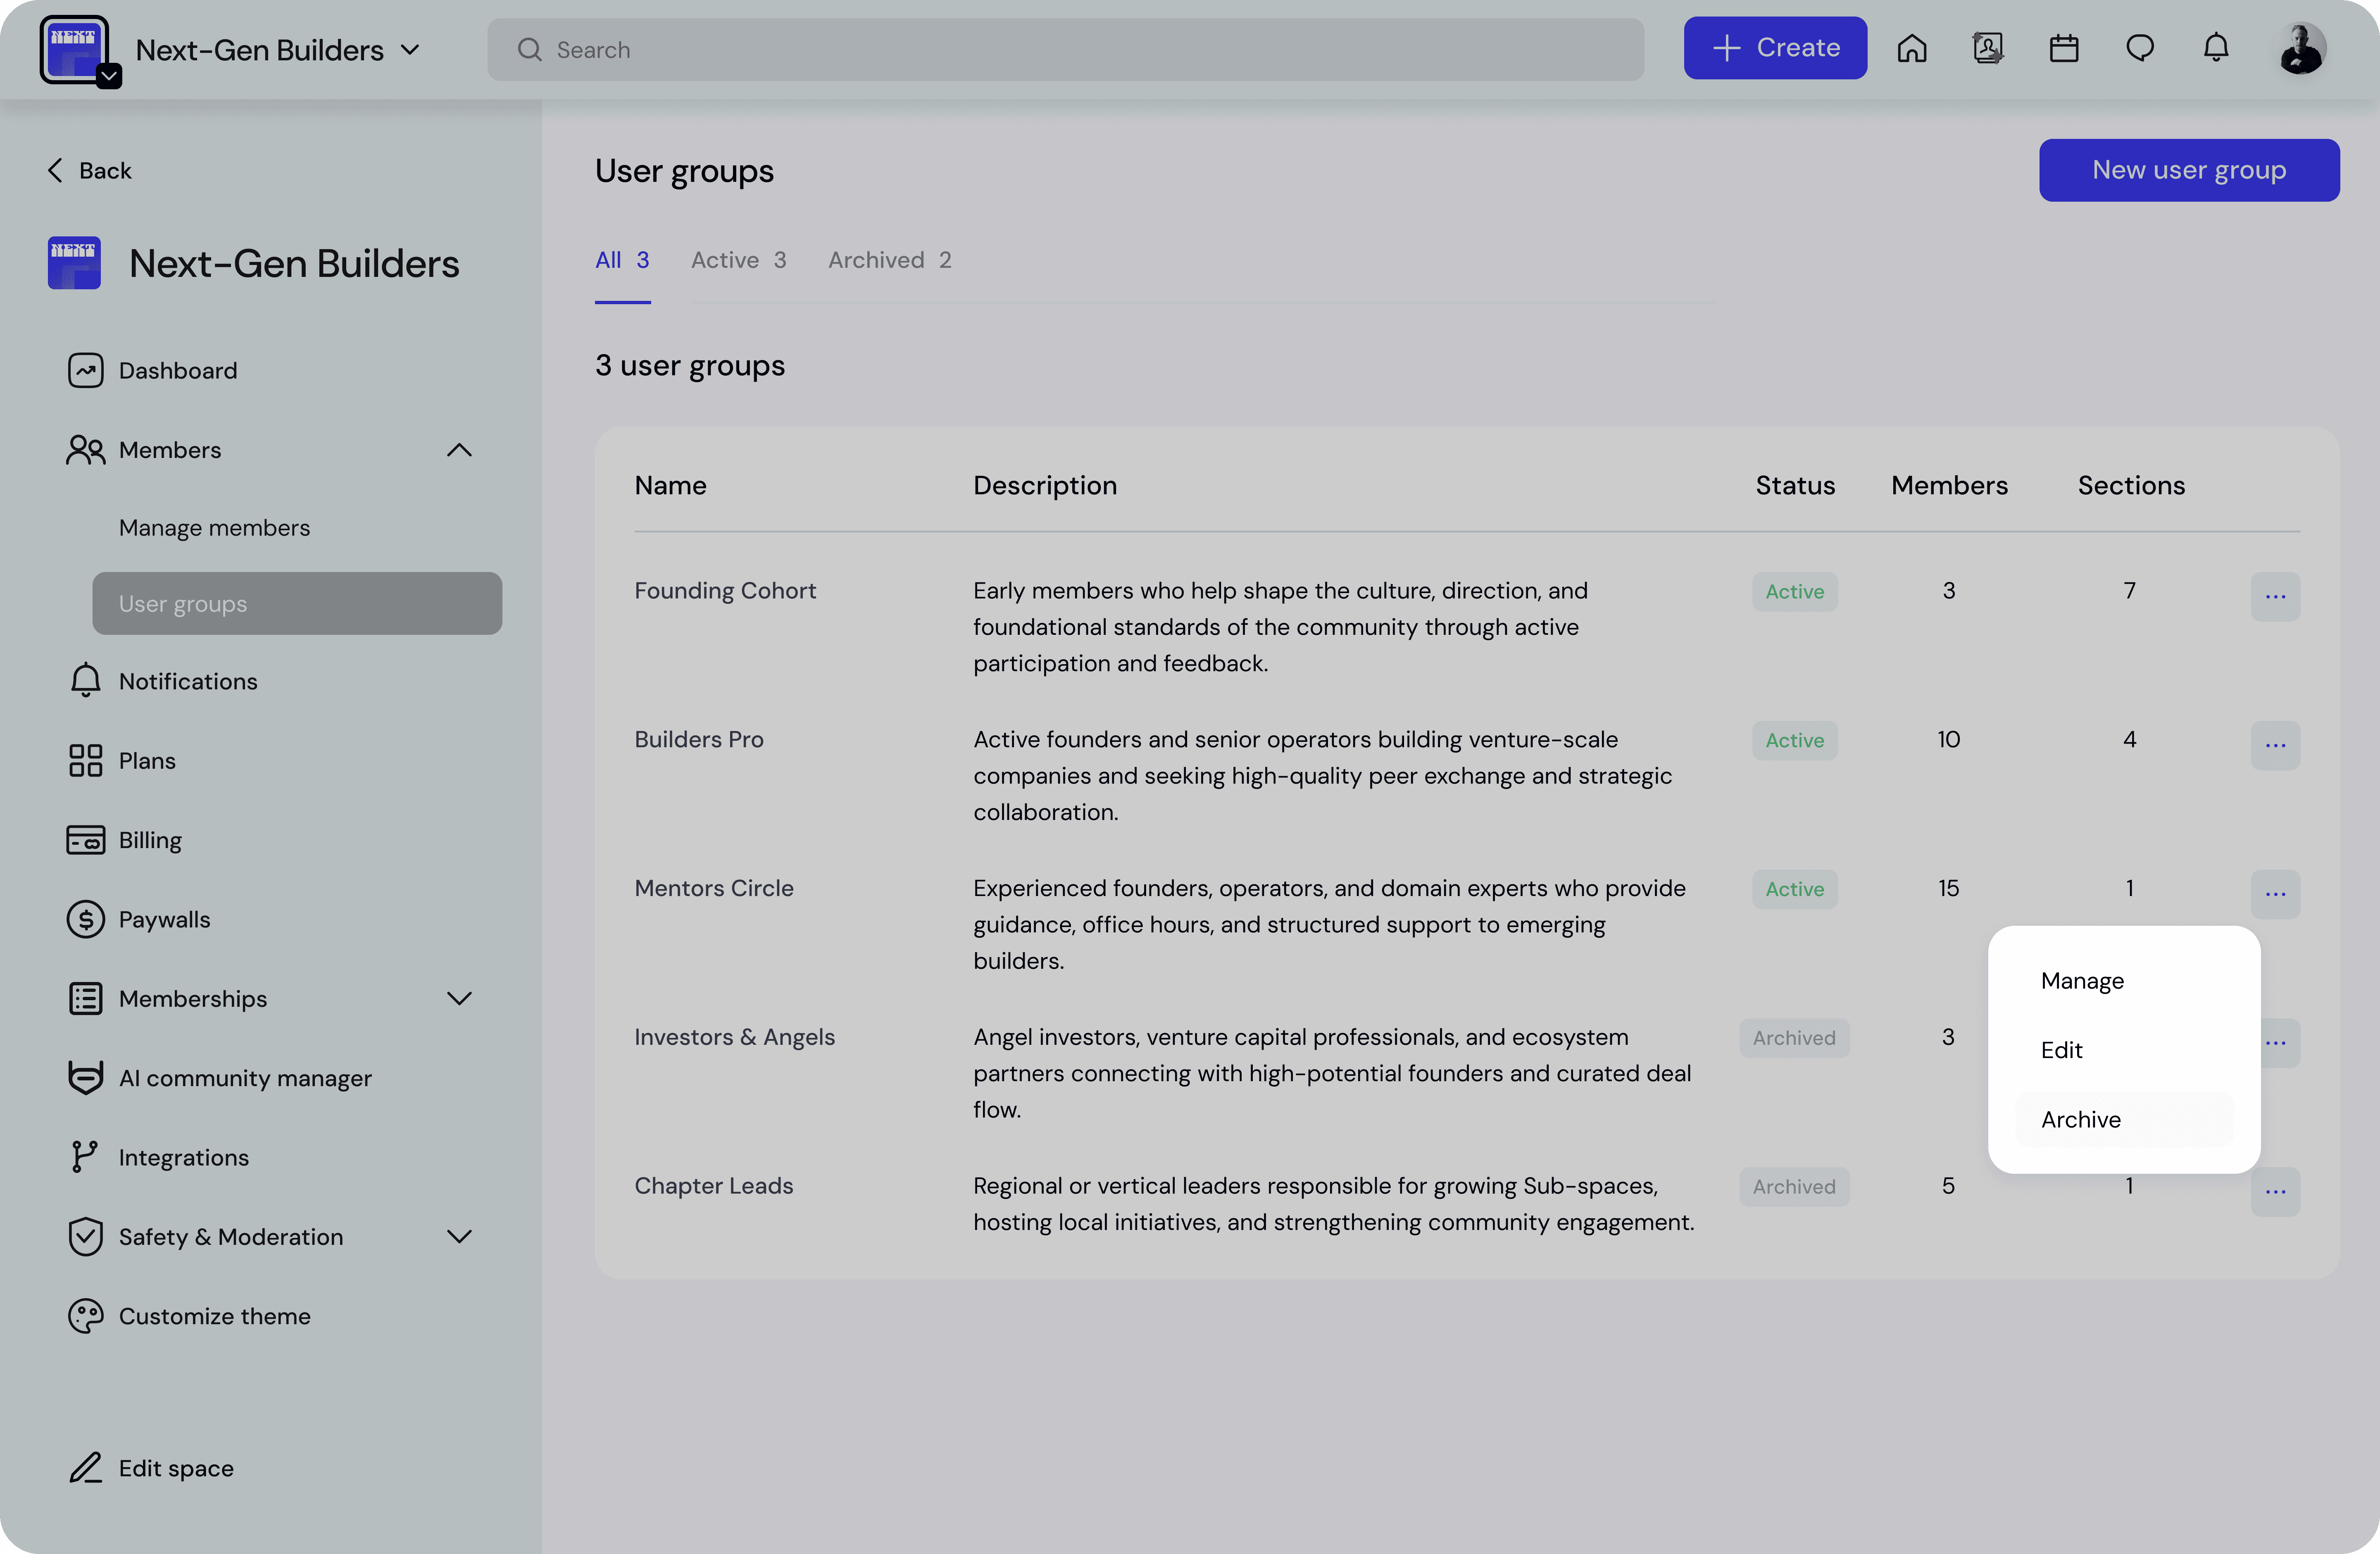
The group will now appear in the User Groups list.
Add Members to a User Group
You can add users to a group while managing its settings.
Go to Members → User groups.
Click the three-dot menu on the group.
Select Manage.
Inside the group settings:
Under Users, click Select users.
Search and select the members you want to add.
Selected members will appear in the list and automatically receive the group’s access permissions.
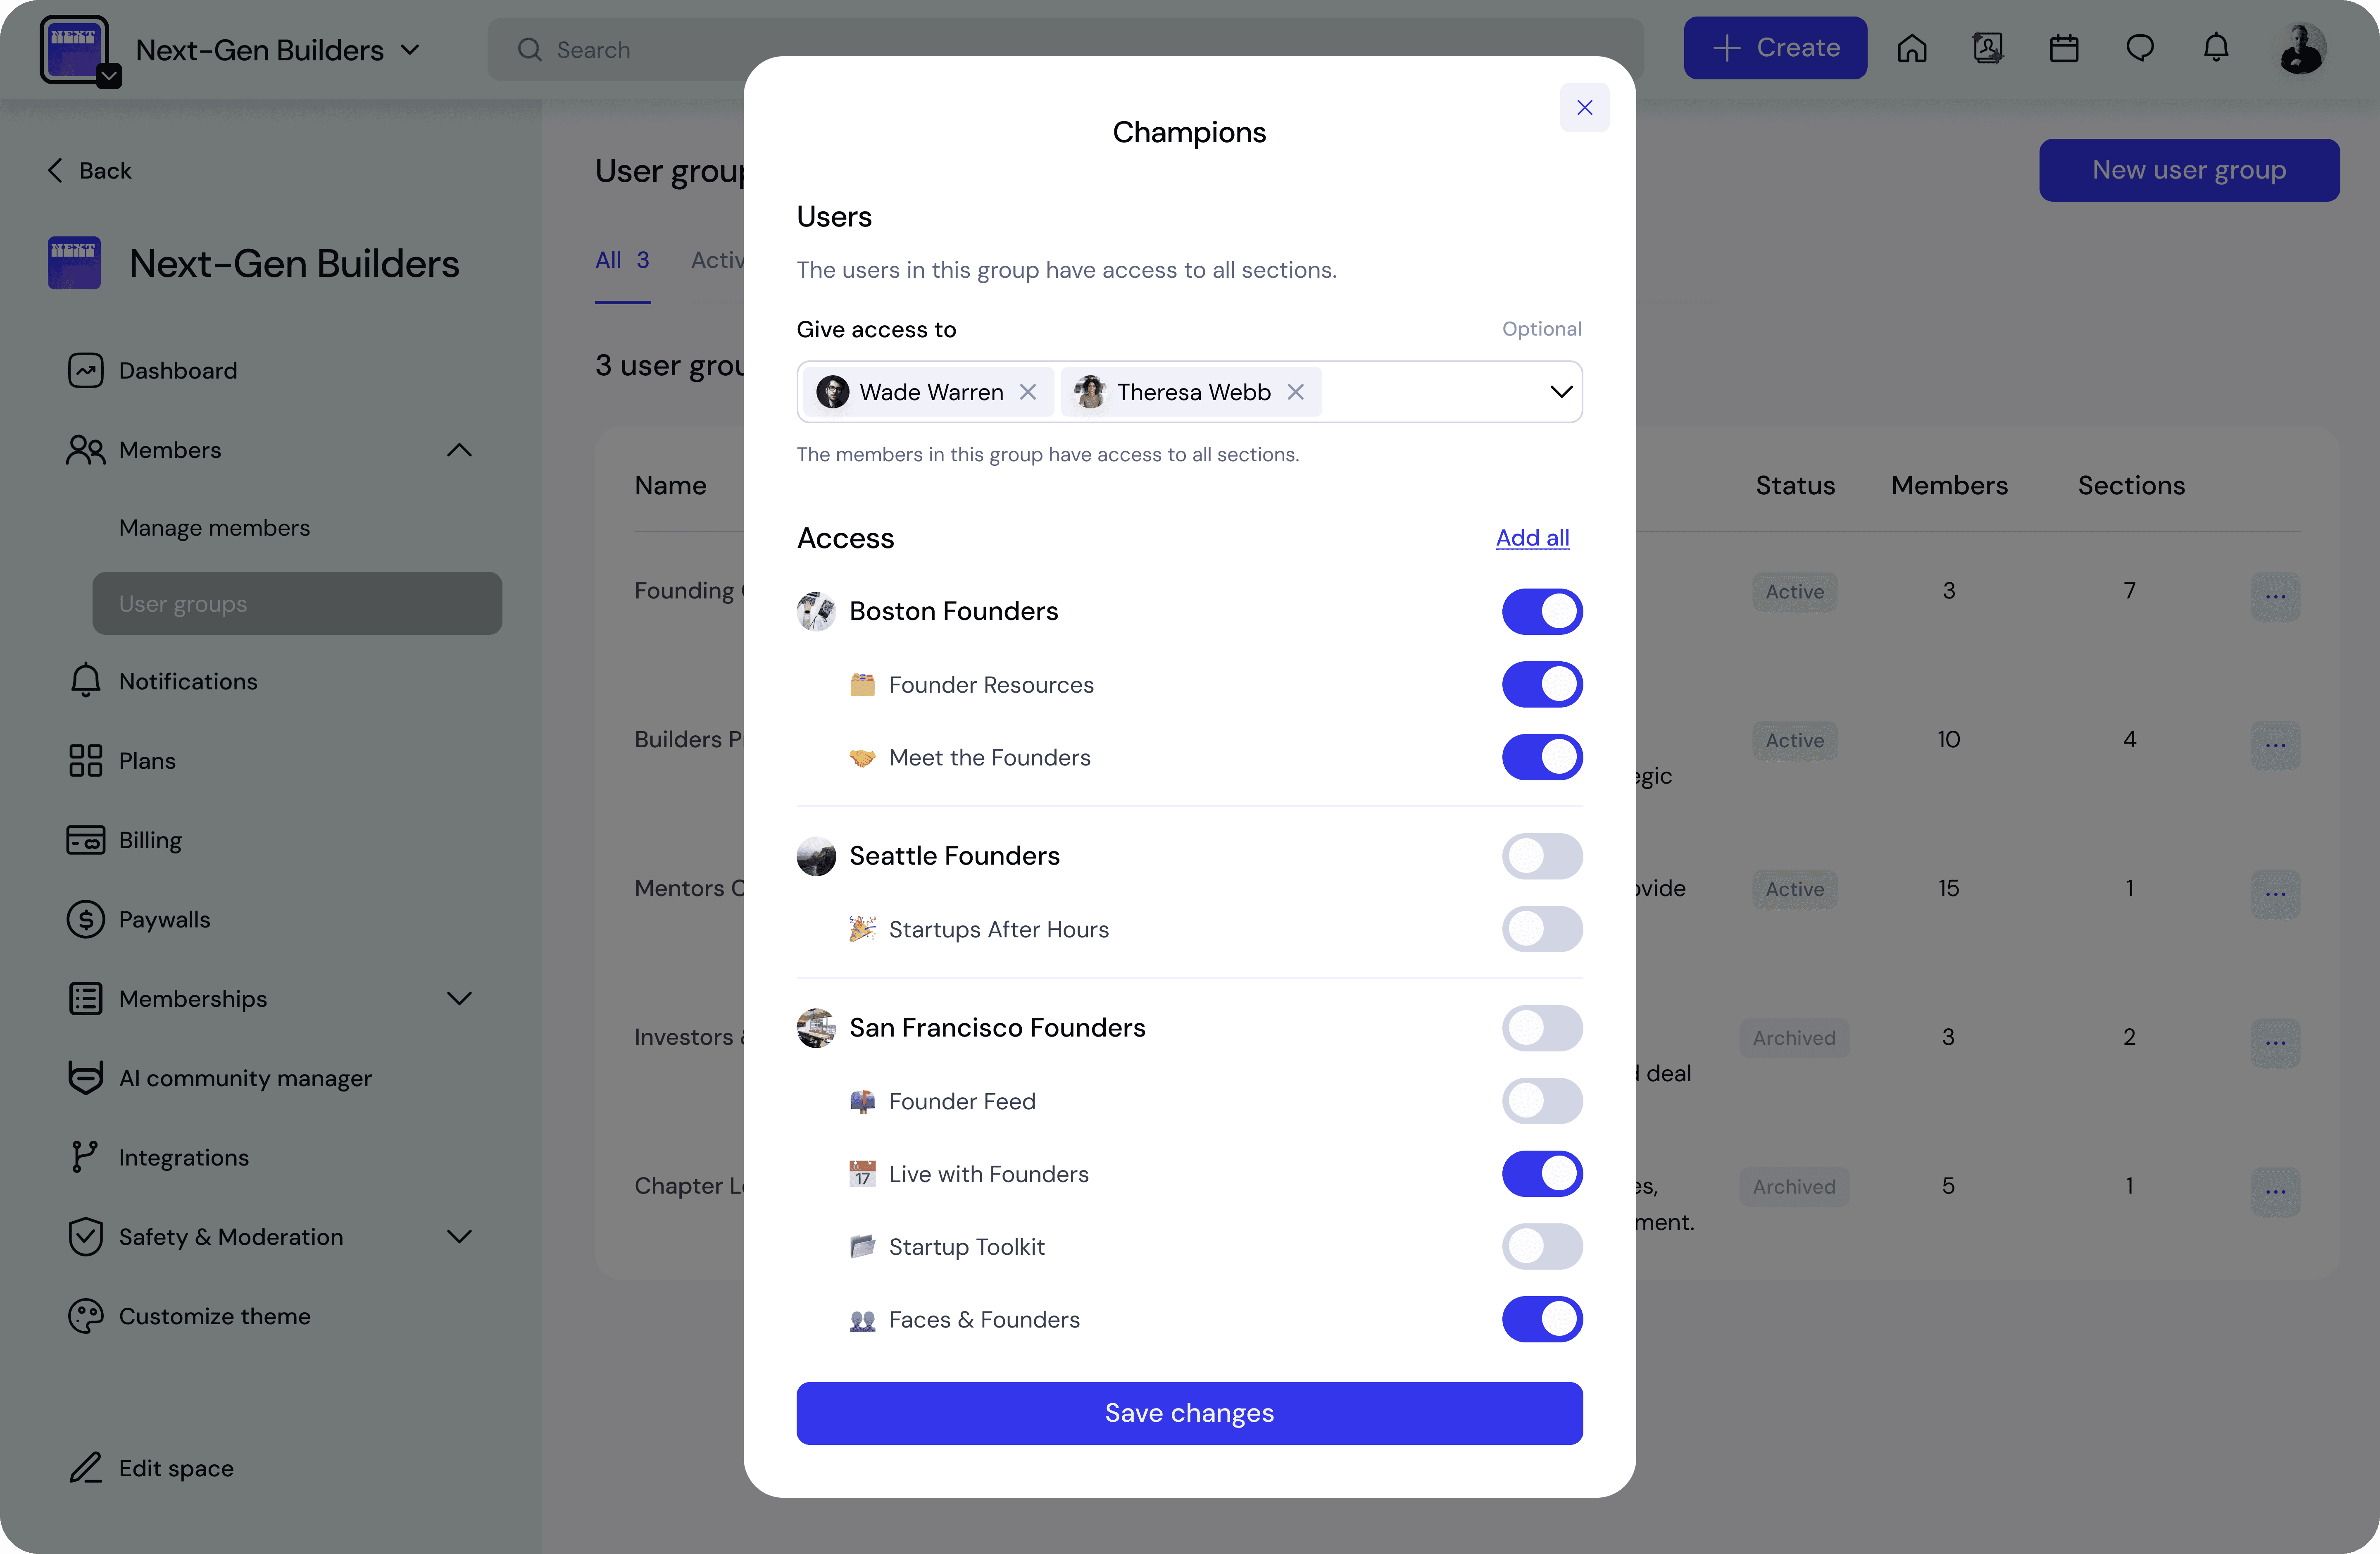
Assign Access to Sub-spaces and Sections
User groups control access through an Access Mapping panel.
To configure access:
Open the group using Manage.
Scroll to the Access section.
You will see two columns:
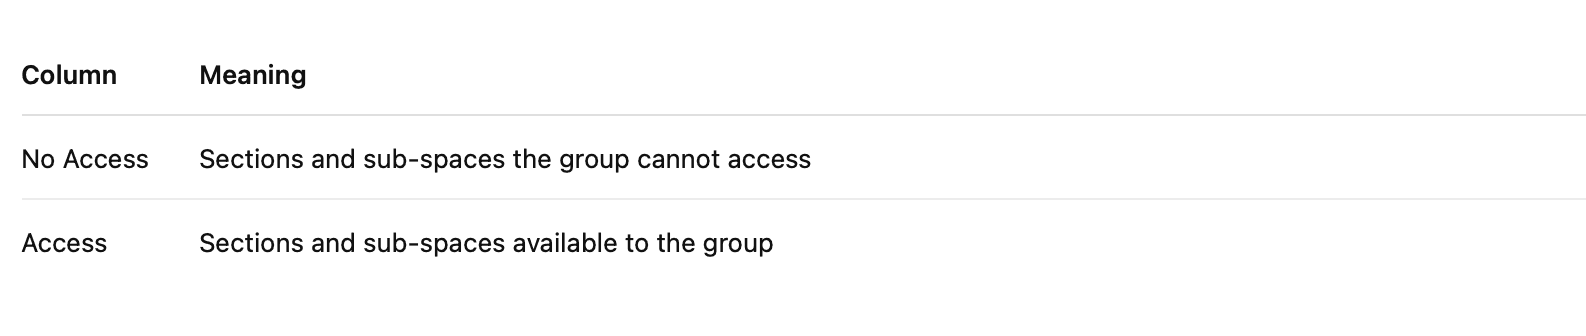
Grant Access
To give the group access:
Locate the sub-space or section in No Access.
Click Add.
The item will move to the Access column.
Members of the group will now be able to view and interact with that content.
Grant Access to an Entire Sub-space
You can also grant access to a full sub-space.
When a sub-space is added:
all sections within that sub-space become accessible to the group.
Remove Access
To revoke access:
Locate the item in the Access column.
Click Remove.
The item will move back to No Access.
Members in the group will immediately lose access to that content.
Save Access Changes
After modifying access rules:
Click Save changes.
A confirmation dialog will appear.
Confirming will apply the new access settings to:
existing group members
future members added to the group
Edit a User Group
You can edit a group’s name or description.
Go to Members → User groups.
Open the three-dot menu next to the group.
Select Edit.
Update the information and click Save.
Archive a User Group
If a group is no longer needed, you can archive it.
Open the three-dot menu.
Click Archive.
Archiving a group will:
prevent it from being selected in new entry points
stop workflows that automatically add members to it
keep historical records of the group
To confirm, type CONFIRM and click Archive.
Unarchive a User Group
Archived groups can be restored.
Open the Archived tab in User Groups.
Click the three-dot menu.
Select Unarchive.
The group will become active again.
Best Practices
Use groups to scale permissions
Instead of managing permissions individually, create groups such as:
Free Members
Pro Members
Moderators
Event Hosts
Combine groups with membership tiers
A common setup:
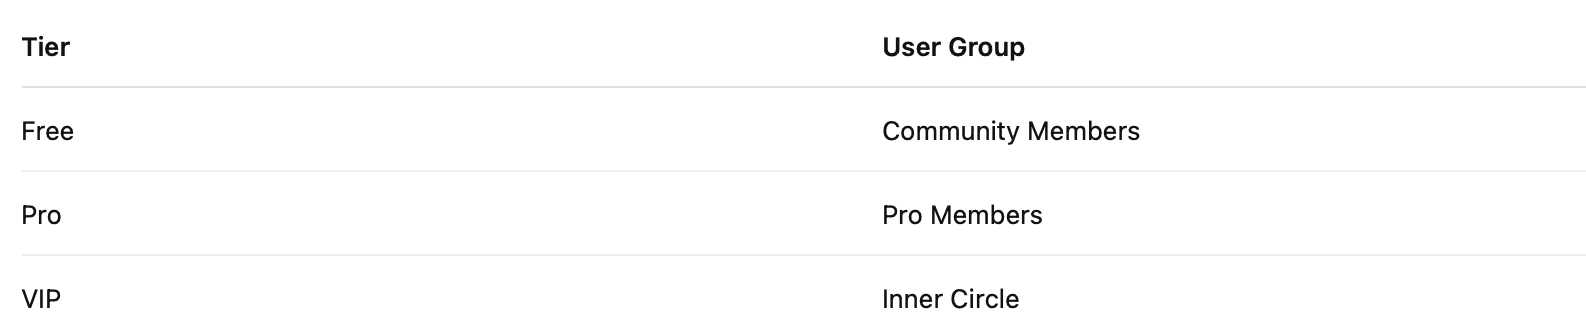
This allows subscription tiers to automatically control content access.
Keep groups purpose-driven
Each group should represent a clear purpose, such as:
access level
membership tier
moderator role
regional community